


iOS Development Tutorial series: Beginning iOS Development
To get started with iPhone development you will first need to learn some things…
Firstly, some history is always useful when learning something new. iPhone apps are written in a computer programming language called Objective-C which was originally created by a company called NeXTSTEP. Apple soon purchased Objective-C and used it to develop their operating systems. Objective-C is used on many different platforms today, like, iOS and Mac OS X.
That’s enough history for now, we’re not in high school and it’s not incredibly important to this series of tutorials.
I’m writing this series of tutorials assuming that you have no experience with computer programming so there are really no prerequisites to this series, other than knowing how to run a computer with general competency.
Step 1: You are going to need a few things before you can get started developing apps for the iPhone, iPad, or any iOS device
1. Intel based Mac
2. xCode
Obviously you must have a Mac to continue to step 2, so if you have a Mac follow the these instructions to get started with xCode.
Step 2: Lets download xCode so we can start making our apps.
1. Go to the iOS dev center on Apple’s website
2. Now you’re going to want to signup by clicking the register link. Follow the instructions on the screen until you are completely registered, then proceed to the next step.
3. Once you are registered go back to the iOS dev center page and login.
4. As soon as you login you should see a page that looks like this:
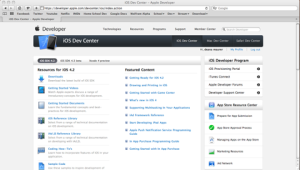
You can instantly see that Apple has tons of documentation, sample code, and tutorials, all at your finger tips.
You can explore around here if you want to, but right now we’re going to skip this and get to xCode.
(this page contains nearly everything you will need to get started making iOS apps)
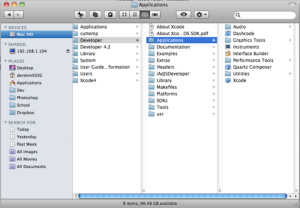
5. Scroll to the bottom of the page and download xCode.
(you should see something similar to this)

6. Once you have downloaded xCode, go ahead and install it.
7. Go ahead an open xCode. You can find it by going to your main hard drive and click developer>Applications.
8. Click File>New Project where you will be presented with a window similar to this:

9. Choose a “View-based Application” and give any name.
(here is what your window should look like)
Step 3: We now have xCode fully setup and a new project started. Lets look into some of the features xCode offers.
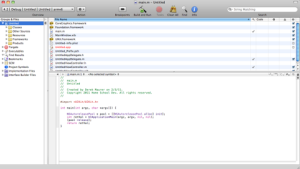
All your code and resources (and pretty much everything) is organized into folders on the left hand side of xCode.
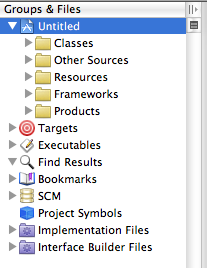
This is called “groups & files” and it’s map to everything in your program.
Your code is organized into folders, most of your code will go in the “Classes” folder.
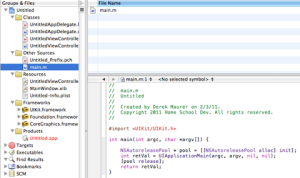
Your code is stored in files with the extension “.h” and “.m”. If you click on the files you will see the code that is stored in that file on the right side of xCode.
We won’t worry about understanding the code or the files it’s stored in right now, we’ll get to that later.
If you look at the top bar you will see some buttons that pertain to your project.
![]()
Lets start from the left and work our way over…
On the very left you have the target selector. In this menu you can choose run your app in the app simulator (we’ll get to this soon) or run your app on your device, you can only do this if you paid the $99 developer fee. The only advantage you get from paying the $99 dollar developer fee is the ability to run your apps on your device and post your apps to the app store. I would suggest not paying this until you have an app that is ready to be uploaded to the app store. In this menu you can also chose the targets and your active configuration (we’ll talk about this in a later tutorial).
The action menu is pretty self explanatory and it’s essentially the same as right clicking on a file.
Breakpoints are a very useful thing when making iPhone apps. Breakpoints allow you to run a program and stop the program from running on a certain line of code. This is very useful for finding problems in your program.
The “Build and Run” button opens your project in the iPhone simulator so that you can debug your app and make sure it’s setup the way you want it. This button is very useful and you will use it in nearly every app you make.
The “Tasks” button will stop your app from running after click the “Build and Run” button.
The last two buttons are pretty self explanatory.
Lets go back to the “Build and Run” button… Go ahead a click it.
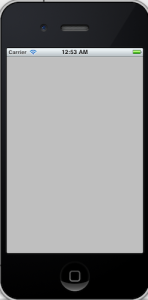
You will see a window like this. As you can see there’s not much going on here… That’s because we haven’t made any changes to our project. This is just an example of how you will open your project and run them just as they were an app on your iPhone or iPod.
We have now gotten xCode up and running and have explored it a little bit. This is all we will do for this tutorial, but in the next tutorial we will go al little bit more in depth and I’ll start explaining what computer programming and Objective-C is and what it looks like.
Keep an eye out for the next tutorial!
Derek is an iOS developer and owner of HomeSchoolDev and creator of MiBinaryClock. If you have questions about this tutorial you can leave a comment or email Derek.